Tuesday, May 7, 2013

Back At It

I haven't gotten much- anything- done lately due to the weather and other things.  I have decided to use the greenhouse window on the back porch instead of the kitchen.  That eliminates me having to rig it to fit, paint the frame to match the others, and me having to climb up in the sink to water the African Violets.  Hopefully, I can get the replacement window in today- depending on how the training session goes.


Lovely Rita foaled during the last thunderstorm.  Meet Mona Lisa!


Sunday, April 28, 2013

Just Like Grandma's!

I found  the perfect farmhouse sink just sitting in someone's barn.  They'd removed it when they remodeled because it was too big.  It's a 5 ft., double basin with double drainboards.  And in perfect condition!  One little ding on the top corner.  I have a few dings myself. 
I'll change the faucet to bronze and it'll look great in my kitchen.  And for only $200!
It reminds me of my grandma, Ma Minnie, and her wonderful Victorian home.  She had an outhouse too, but I'll skip that.


Now, I just need a huge claw foot tub and one of these-

Tuesday, April 16, 2013

It Ain't Fittin', It Just Ain't Fittin'!

I have this greenhouse window that I initially planned on using in the bathroom.  Then I decided to put it over the kitchen sink instead- after I built the frame and the wall.  Doh!
It's an older window that installs from the inside instead of the outside.  That's the problem, I didn't build a frame inside.  So now I have to figure out how to add one.  And since the he-men around here keep saying I can't, I will!  

I'm still working on getting the tiles up on the roof, slowly but surely.  Ten of these suckers weigh as much as I do.  Repeat after me- "It's better than metal, it's better than metal."

Tuesday, April 9, 2013

Why Didn't I Take Up Knitting...


Today's plan is to start moving these heavy ass tiles up to the roof.  I found  these on Craigslist- heck of a deal!  Right now, they're supporting my rose fetish, but I have a plan for moving those onto the
trailer by the old pool.  Until someone needs to use the trailer.
Since I'm working alone, I'll have to do it the hard way, as usual.  Put as many as I can push in my trusty wheelbarrow, stack a small pile on the short scaffold, climb scaffold and transfer to the higher scaffold, climb that scaffold then move them onto the roof.  Rinse and repeat.  Sounds simple enough,
huh?  Makes plastering seem like a picnic.

I've gotten all my windows and doors from Craigslist.  Got 12 arched windows, patio doors, a greenhouse window and a gorgeous leaded glass door- for $200!  And I just picked up 6 brand new Pella windows ( the kind that fold in to clean)- for $200!  Those are for the back porch.  I originally
planned on a screened porch, but decided to use windows because a) I want to be able to block the north winds in the winter so I can still use the porch, and b) to keep the dogs from scratching the screens. 
Even if it was Lips who opened the door and came in the kitchen.
Ever try to turn a horse around in your kitchen at 2 a.m.?  Never a dull moment around here!

I have no idea why this post keeps changing its alignment or why the preview is in French. 


Sunday, April 7, 2013

Wasps and Lizards

I've been working on the plastering, in between other things.  I decided to use Quikcrete Stucco Mix, because it's easier for me when I work alone.  Two coats of basic mix, followed by one top coat mix. 
It works better doing it by hand than with the sprayer I bought because I have to scoop the plaster out of the wheelbarrow, and that gets monotonous and heavy.  And darn near impossible to reach the top.
I actually prefer hand troweling anyway. It takes longer, but it's kind of meditative- like gardening.
I have a bit more stuffing to do at the roof beam on one side, so I'm almost finished with the first coat.  I've started doing the second coat on the other side too.  Which side I do depends on where the damn wasps are.  Who knew they love plaster?
I've been working alone lately so I've had to figure out how to do things differently.  I can't lift the stucco bags, so I push them off the stack into the wheelbarrow.  This would be a lot easier if the dogs didn't "help".  Lizards like to hide in the pallets under the stacks, so as soon as I touch the tarp, the hunt begins!  Apparently lizards are tasty.


Saturday, January 26, 2013

So now the roof is up


I choose to use W.T.Grace Triflex underlayment instead of regular roofing paper because it would be left exposed until after the walls are up and plastered.  It's much more durable in our windy conditions.

I used rigid foam insulation between the toe-ups; it's super easy to cut with just a knife.   I glued it down with some Liquid Nails.


Then it was time to bring on the bales!  Our bales had been stacked and covered in the barn for a few years.  So we found a few surprises inside- like a mummified cat.  But, hey, no rattlers!

This is where you have to watch for 'bale frenzy'.  Don't get in a hurry to get that first wall up!  You'll just end up doing it over.  Trust me.  Take your time and pack 'em in tight.  I had already marked where the outlets go and ran the wires up to the attic.  T made a tool for retying the bales.
The chainsaw was too heavy for me, so I got a battery operated Ryobi.  At this point, I'm using mostly Ryobi One+ tools. Love these!

We used bamboo on the north wall because that's where we get strong winds.  It's always windy here, but sometimes it's really windy.  We also left all the bracing up so the window bucks wouldn't get moved while we were banging the bales around.


The top rows are notched to fit the top beam, then stuffed with flakes. I try to keep the straw swept up-I stuff it in bags to use later when I need to fill in holes and spaces. I'll do that when I prep for plaster. We were closely supervised the whole time.

Now all the walls are up and we're ready to start prepping for plaster.  We're adding the window as we go and filling in where needed.

Been a while...

...dealing with life and family problems.  I'll do some catching up now, 'til something else happens.

We've been working on the house again, slowly but surely. We've started doing the plaster, but I'll post some pics of the 'before' process. Most of them are stored on a dead computer, of course.  If you're thinking of building your own straw bale house, the one thing I can tell you is that you must be creative!  I've watched and read everything published in the last 10 years-  they do not cover everything!  And you must think ahead- especially how the various parts connect.

Our house is modified post & beam, with three bale walls and one stud wall. I'm using a regular stud wall on the back because I changed the house size after we'd already built the floor beams.  We only need one bedroom now, so the last 20 feet will now be my screened porch.  I didn't want a heavy wall since there isn't a continuous beam running across there.

We had ordered all the lumber at once, but because I'd changed things (again), I needed a few more 4x4's.  So I just grabbed them at the closest place- Alamo Lumber. Simple right?  No.  Alamo's 4x4's were NOT the same dimensions as Home Depot or my local lumber store! It was 3 1/2x3 1/4. And no one else noticed until I got there. Sigh.

Other than that, no big problems with the wall beams, window bucks or top beam. The rafters were another story. In the middle of putting them up, we had another 'strong wind' day. Actually, it was a night. When I went out in the morning, they were all down.


Which turned out to be a good thing (not the part where my dear husband dropped a 2x4-on my nose!). When they reset them, this time they braced them like I told them to in the first place. Men. Hmph. 
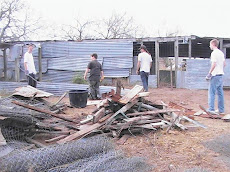


Friday, September 19, 2008

Slow but sure


It's taken quite awhile to get this going. We're digging the piers ourselves and everytime we clear the holes, another hurricane comes by to see how it's going. You would think digging in sand would be fairly easy. HA! We drilled the holes with a tractor- worked fine on the shady side, barely made a dent on the sunbaked side. But they're finally dug and we have half of the piers up.
Only problem is these pesky hurricanes, see. They miss us but they leave a bit o' rain to remember them by. So the holes that aren't filled have to be scooped out and dry before we can pour the cement. We've found it's easier to soak the water out.

Saturday, April 26, 2008

You're building...what?

Tell someone you're building a house out of straw bales and they look at you like you just farted in church. You have to wait until they stop laughing and telling the same lame 'big bad wolf' jokes before you can explain how it works.

We've been discussing this for years, and now we're finally ready to get started. The site was previously home to cocks-you know,fighting roosters. We thought we'd just knock the crappy cages over. Apparently cocks are quite strong because these posts are really deep! The boys worked hard to clear everything and without any major injuries.


Supervising is fun!